Vienna Loaf
Once again we are using much the same simple water/flour/yeast/salt recipe that creates the dutch oven bread, the ciabatta and so forth. This dough is a touch wetter than the others with 3 parts of flour, instead of 4, to 2 parts of water.

Ingredients
1. Starter
- 2 teaspoons active dry yeast
- 200ml warm water
- 200g Hi-Grade White Flour
Combine these in a bowl to make a sticky dough, cover and place in fridge overnight. Remove and allow to return to room temperature.
2. Main Loaf
- 200ml water
- 2 teaspoons salt
- 400g Hi-Grade White Flour
- Remove the starter from the fridge, pour in 200ml water, and blend to combine.
- Place the flour and salt in the bowl of a mixer and add the starter. Using dough hooks on slow-medium setting, mix until dough is uniform, then for 60 seconds.
- Leave for 15 minutes for flour to absorb water thoroughly, then mix for 60 seconds.
- Leave (covered) for 15 minutes, then mix for 60 seconds
- Leave (covered) for 15 minutes, then mix for 60 seconds, then leave (covered) for 15 minutes again.
- Remove dough from bowl onto floured surface, and dust top with flour.
- Preheat oven to 220C. (If using method 11.2, place baking stone in oven at this point.)
- Flatten dough onto floured surface, and, with fingers, form into a square about 15ml thickness.
- Roll up tightly, and shape/stretch the dough gently into a longish loaf, approx. 300-350mm, with slightly tapering ends.
- Either:
- Place loaf seam-side down onto baking tray and leave, covered with tea towel, to prove for 45 minutes or double in size. Dust top of loaf with flour, and with a sharp knife, make a light cut down one side of the loaf. Place ovenproof container of water - about half a cupful - onto bottom rack of the oven. Place baking tray in oven, cook for 20 min at 220C then lower temperature to 200C for 15-20 minutes or until loaf sounds hollow when tapped on the bottom.
- As for 11.1, but put formed loaf seam side down onto floured board or peel from which you can slide the risen loaf onto the hot baking stone. As a baking stone may leave the bottom of the loaf a touch softer than you want, turn loaf over for last five minutes. Alternatively, allow the dough to rise on a floured teatowel from which it can be rolled, first onto the peel, then onto the baking stone.
- Cool on wire rack.
Notes:
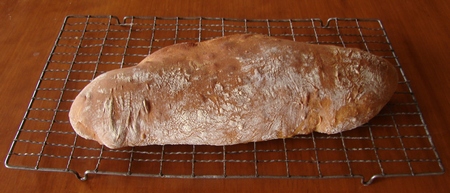
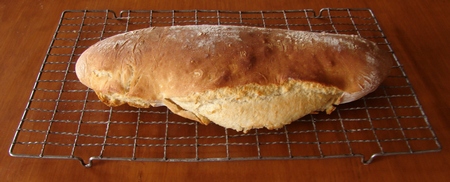
- The first time I used a baking stone, my cut was pretty much neutralised when I nudged the loaf off the floured board and onto the hot stone. The result was that the loaf completely ignored my cut and burst out all over, looking a good deal like me dressed in last year's clothes, after an uncommon side effect of my new heart pills put on a lot of weight real fast.
- I will probably do the final proofing on a floured teatowel, which passes for a couche in this neck of the woods, so it will be easier to transfer to the board and then the baking stone. Proofing it on the floured board still generates a degree of adhesion that decreases the general quality of the baker's life.

My next effort, instead of a lengthwise cut, more traditional, will be a series of diagonal cuts across the top of the loaf, after I have positioned it on the stone.
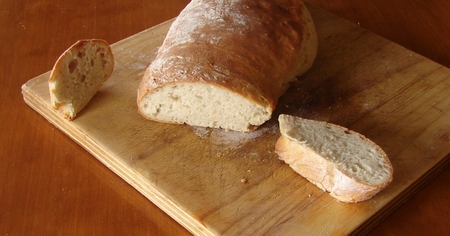
3. The crumb and crust, however are pretty much the way I wanted them, not quite as open as a ciabatta, and a slightly larger cross-section. The loaf is a touch flatter than I wanted, so I may increase the flour quantity slightly, or decrease the liquid.

|
WELCOME
RECIPES HOME PAGE
DAVE ON CURRY
BAKING
Sauces, Chutneys, Relishes, Jams and Marmalade
Tramping (Hiking)
Tucker
Kefir
Snacks
Spreads, Dips, Entrees, and Dressings
Soups
MAIN COURSES:
Vegetarian
MAIN COURSES:
With Meat or Fish
Desserts
|


